Installing a DIY mini split can be a rewarding weekend project. With upfront costs typically ranging from about $1,000 to $3,500 (before labor savings), it's an affordable way to bring efficient heating and cooling into your home. Companies like Zone-Air and MRCOOL DIY have made it easier than ever for homeowners to handle installation themselves, using basic tools like a drill, wrenches, line sets, and refrigerant lines.
But once your mini split is up and running, the job is far from over. Regular mini split upkeep is essential to keep your system humming efficiently and to extend its lifespan. In this post, I’ll walk you through the essential maintenance tasks, share how hands-on involvement builds confidence, and why the setbacks along the way are just part of the learning process.
Why DIY Mini Split Maintenance Matters
Many DIYers focus heavily on installation—and rightly so, it’s a demanding project—but after installation, routine upkeep is vital to keep that investment paying off. Mini splits are complex HVAC systems that rely on proper air flow, clean filters, and correct refrigerant levels.
Skipping maintenance might not cause immediate failures, but over time, dirt and debris clogging filters, imbalanced refrigerant levels, and neglect can reduce efficiency, increase energy costs, and shorten system life. On the flip side, regular attention means you’re catching issues early, saving money in repairs and energy bills down the road.
Key Mini Split Maintenance Tasks
Here are the everyday and seasonal upkeep items you should have on your radar. Don’t worry—these tasks don't require fancy equipment, just a bit of planning and the right mindset.
1. Clean Washable Air Filters
Arguably, the simplest and most important maintenance step is regularly cleaning your mini split’s air filters. These filters trap dust, pet hair, pollen, and other airborne particles, protecting the indoor air quality and preventing the system from overworking.
- Frequency: Aim for once every 2-4 weeks during heavy use seasons. How to Clean: Most filters are washable. Remove the front panel, take out the filters, rinse gently with lukewarm water, and let them dry completely before reinstalling. Tip: Keep a small notepad near your system to jot down when you clean filters—consistency is key.
2. Check Refrigerant Levels
Refrigerant is the lifeblood of your mini split system—it moves heat from inside to outside (or the reverse). Low refrigerant levels don’t just reduce cooling or heating capacity; they can damage the compressor and increase power consumption.
- How to Check: Unless you’re a licensed HVAC technician, handling refrigerant directly isn’t recommended. Instead, look for signs like uneven cooling, ice buildup on lines, or frequent cycling. When in Doubt: Contact a professional for a refrigerant check. Some manufacturers like MRCOOL DIY systems are designed with homeowner-friendly diagnostics, easing troubleshooting.
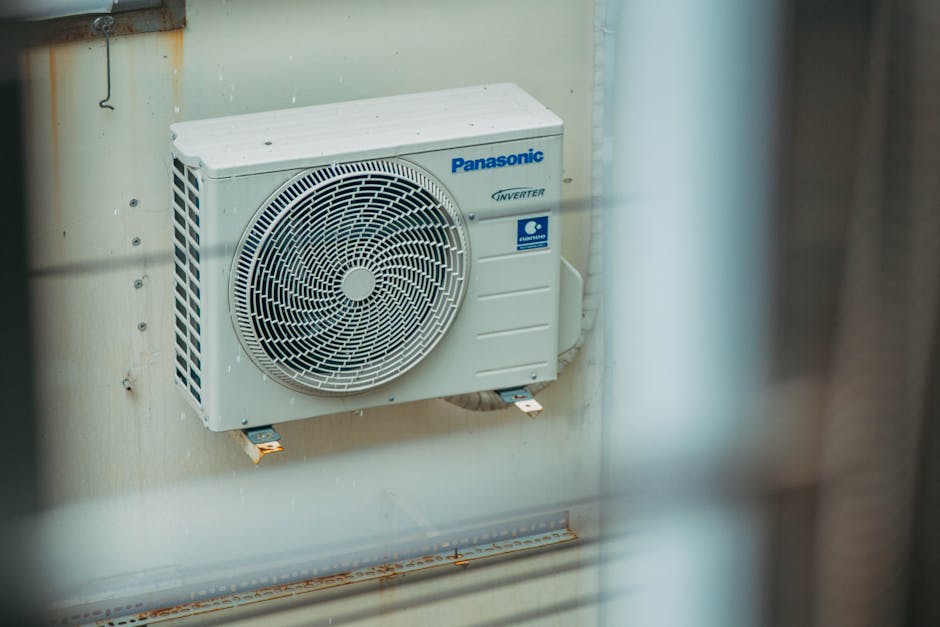
3. Inspect and Clear Outdoor Unit
The outdoor condenser unit is exposed to weather, debris, and insects. Leaves, grass clippings, and dirt can accumulate, restricting airflow and causing heat exchange inefficiencies.
Turn off power to the unit before inspecting. Remove leaves, dirt, and debris around and inside the unit using a soft brush or your hand. Clear at least 2 feet of clearance around the unit for proper airflow. Gently rinse fins with a garden hose if dirty, taking care not to bend the delicate fins.4. Check Indoor Unit for Dust and Moisture
Look under the indoor unit for dripping water or unusual moisture—signs that the condensate drain might be clogged.
- If you note water pooling, clear the drain pipe or have it serviced. Wipe down the unit’s surface with a damp cloth occasionally to remove dust buildup.
5. Monitor System Performance via Smart Controls
If you’ve integrated your mini split with smart home devices like Amazon Alexa, use these tools to monitor performance, create schedules, and catch anomalies early.
Smart integration isn’t just a convenience—it’s a diagnostic aid that helps you stay ahead of maintenance needs.
Planning and Preparation: The DIY Maintenance Mindset
From experience, the key to mastering mini split upkeep—or any home system—is solid planning and preparation.
- Measure Twice, Fix Once: Before diving into maintenance, review your system's owners manual and layout; know exactly where components like filters, drains, and shut-off switches are. Label and Organize: If you remove parts, keep them labeled in a zip bag. Trust me, it saves frustration when you’re ready to reinstall. Set Reminders: Use your calendar or smart home assistant to remind you when it’s time to clean filters or inspect the unit. Keep Basic Tools Handy: A simple toolkit with a drill, wrenches, and your mini split manual should be within reach during maintenance efforts.
Learning and Growing Through Setbacks
Let’s be honest—DIY maintenance can come with surprises. Maybe you find a broken clip on the filter frame, or hesitate when the refrigerant check feels over your head. These setbacks aren’t failures; they’re stepping stones to deeper understanding.
I keep a notepad next to my tools to jot down lessons and mistakes before trying again. Documenting your process builds confidence—the kind that transforms you from a nervous beginner into a knowledgeable homeowner.
Besides, the satisfaction of diagnosing a minor problem and fixing it yourself is one of the best returns on your initial mini split investment.

Maintenance Schedule Summary
Task Frequency Tools Needed Notes Clean washable air filters Every 2–4 weeks during use Water, mild soap (optional), soft cloth Ensure dry before reinstalling Inspect outdoor condenser unit Monthly during use Soft brush, garden hose Turn off power before cleaning Check for moisture or leaks indoors Monthly Flashlight, towel Clear condensate drain if needed Refrigerant level check (professional) Annually or when suspecting issues Professional HVAC service Use manufacturer diagnostic tools if available System performance monitoring with smart controls Continuous Smartphone, Amazon Alexa or app-enabled controller Set alerts for abnormalitiesWrapping Up: Confidence in Your Mini Split Journey
Owning a DIY mini split is more than just owning an HVAC system—it’s about personal growth through hands-on work. Each maintenance task you perform builds your confidence with tools and tech, teaches you about your home’s comfort needs, and makes you less dependent on costly repairs.
Remember, it’s okay to meet challenges or uncertainties along the way. That’s part of the process that ultimately empowers you as a homeowner. With good planning, the right tools, and a proactive mindset, your mini split system will reward you with years of reliable, efficient comfort.
For DIY mini split equipment and parts, check out Zone-Air and MRCOOL DIY—both offer options designed for the weekend warrior. And don’t forget to sync your system with smart https://trans4mind.com/counterpoint/index-home-garden/diy-mini-splits-teach-about-personal-growth.html devices like Amazon Alexa to take your upkeep game to the next level.